BigSigns.com

Inspect the Fence Before Installation

Before installing your windscreen, walk the fence line and inspect the structure carefully. Windscreen and privacy screen materials create additional wind load. A fence that is strong enough to stand on its own may not always be strong enough to carry a screened panel in wind.

Your chain link fence should be:

  • Properly tensioned
  • Securely anchored
  • Free of damaged posts or loose rails
  • Structurally capable of handling additional wind load

Never install windscreen on unstable or damaged fencing. Adding screen material to a compromised fence is one of the most common causes of fence collapse, bent rails, and pulled posts during high-wind events.

Choosing the Right Attachment Hardware

The fastener you choose matters as much as the windscreen itself. The wrong tie can fail quickly in outdoor conditions, while the right fastener can help extend the life of the screen and protect the fence structure.

Recommended Fasteners

Hardware Best For Notes
Heavy-duty UV-rated zip ties Most installations UV inhibitors are critical. Non-UV ties can degrade quickly in sunlight.
Stainless steel hog rings High-traffic and athletic facilities Long lifespan; requires a hog ring tool.
Nylon locking ties Standard installs Use UV-rated ties only. Avoid white or clear ties without UV inhibitors.
Bungee ball ties High-wind applications Allow controlled movement and reduce stress on grommets.

Pro tip: Use a two-strength zip tie pattern. Use lighter 50 lb ties along the top and upper sides, and heavier 120 lb ties along the bottom and lower sides. In a severe wind event, the lighter top ties can break first, allowing the panel to fold rather than tearing the screen or pulling the fence down.

Recommended Attachment Spacing

Attachment spacing is one of the most important parts of a successful installation. If fasteners are spaced too far apart, the screen can sag, flap, and wear prematurely. If the screen is pulled too tightly, the grommets and hems can tear.

Product Type Recommended Spacing Notes
Standard vinyl mesh windscreen Every 12–18 inches Default recommendation for most athletic and commercial installs.
Fabric mesh fence screen Every 18–24 inches Lighter material usually requires less tension.
High-wind environments 12 inches or tighter More fasteners help distribute wind load.
Temporary construction fence Looser spacing with slightly less tension Allows panel movement and reduces fence stress.

Always secure:

  • Every grommet
  • Every corner
  • Every reinforced hem

Skipping a grommet concentrates stress on the next attachment point. That is usually where the first failure begins.

  • Step 1: Unroll and Position the Windscreen

    Lay the windscreen flat next to the fence and identify the top edge, bottom edge, and correct graphic orientation.

    Position the panel against the chain link fence before attaching anything. For custom-printed windscreen, verify that all logos and graphics are level before securing the panel. Once tie wraps are tightened, repositioning the screen becomes much more difficult.

  • Step 2: Attach the Top Rail First

    Begin installation at one upper corner and work across the top rail.

    Do not fully tighten the zip ties at first. Lightly secure the panel so you can level and align the graphics before final tensioning.

    Pro tip: Temporarily hang the panel with S-hooks every 10 feet. This holds the panel at the right height so you can attach the ties without fighting gravity.

  • Step 3: Secure the Vertical Sides

    Attach both sides of the windscreen next. Work from top to bottom while pulling evenly to remove wrinkles.

    Do not overstretch the material. The windscreen should remain taut while still allowing slight movement during wind gusts.

  • Step 4: Attach the Bottom Edge

    Secure the bottom edge last.

    This helps distribute tension evenly, prevents sagging, and creates a clean finished appearance. Avoid pulling the screen excessively tight at the bottom.

  • Step 5: Final Tensioning and Inspection

    Once the panel is properly aligned:

    • Tighten all fasteners evenly
    • Trim excess zip tie tails
    • Inspect corners and high-stress areas
    • Confirm that graphics are level
    • Check that the screen can flex slightly in wind

    The finished windscreen should look smooth, have minimal wrinkles, and flex slightly during windy conditions. Over-tightening is one of the most common causes of premature windscreen failure.

High-Wind Installation Best Practices

Coastal, plains, open-field, and stadium-top installations require additional attention. The same panel installed the same way may last for years in one environment and fail quickly in another. Installation technique and mesh selection make a major difference.

Never install windscreen drum-tight.

Allowing slight movement helps reduce:

  • Wind stress
  • Fence damage
  • Grommet pull-out
  • Zip tie breakage
  • Hem tearing

The screen should be secure, but not rigid.

Use Reinforced Attachment Points

High-wind installations benefit from:

  • Reinforced hems
  • Webbing-reinforced edges
  • Additional corner reinforcement
  • Stronger bottom and lower-side fasteners
  • More frequent inspections
Choose Higher Airflow Mesh

Higher airflow fence screen materials reduce wind stress on the fence.

As a general rule:

  • 35% wind pass-through performs better in high-wind conditions.
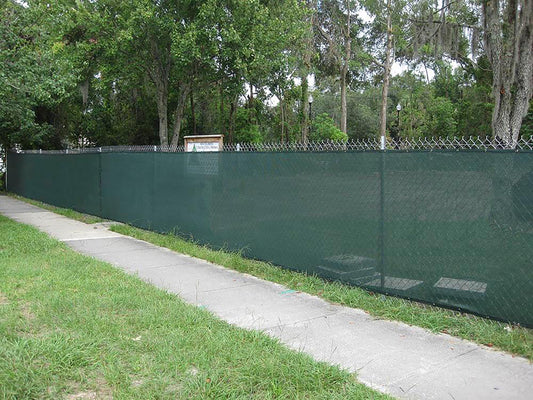
  • Lower airflow privacy screens, such as 90% block materials, create greater wind resistance and require stronger fencing.

If your site experiences sustained winds above 30 mph, speak with a BigSigns specialist about mesh selection before ordering.

BigSigns.com

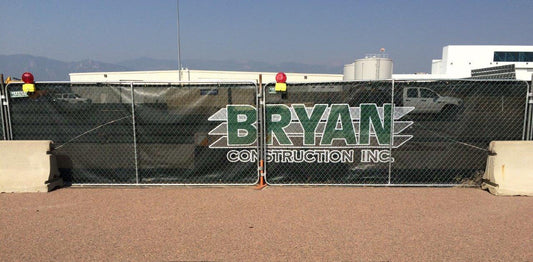
Installing on Temporary Construction Fence Panels

Temporary construction fencing moves more than permanent chain link fencing and should be installed differently.

Temporary fence panels are not anchored the same way as permanent fences. They sit in feet, lean on rails, and can shift due to wind, equipment traffic, and job site activity.

For temporary construction fence panels:

  • Use lighter tension
  • Allow slight panel movement
  • Use heavy-duty UV-rated zip ties
  • Inspect ties periodically
  • Avoid over-tightening corners
  • Replace broken or worn ties immediately

Treating temporary fence panels like permanent chain link fencing can bend panel frames, tear out grommets, and shorten the life of the screen.

Installation by Application

Different sports, facilities, and job sites have different installation considerations. The core technique is the same, but the details below are what specialists adjust for each use case.

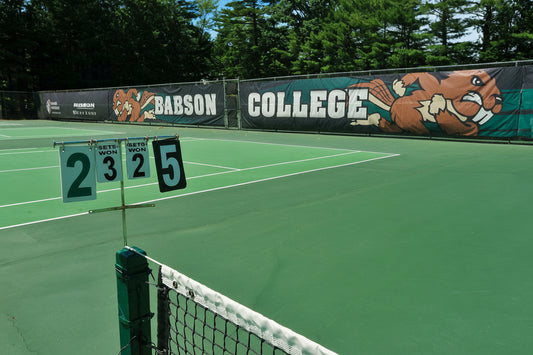
Tennis and Pickleball

Most tennis fences are 10 or 12 feet tall, while many tennis windscreens are 6 or 9 feet tall.

To center the screen vertically:

  1. Subtract the screen height from the fence height.
  2. Divide that number by two.
  3. Use that distance from the top of the fence as your installation line.

For example, if you are installing a 6-foot windscreen on a 10-foot fence, leave approximately 2 feet above the screen and 2 feet below it.

Mark a knuckle of the chain link diamond as a guide so the panel runs level across the fence.


Baseball and Softball

Outfield fence screens and dugout wraps often experience heavy wind exposure, especially in open athletic complexes.

For baseball and softball installations:

  • Use the two-strength zip tie pattern
  • Inspect ties at the start of every season
  • Check outfield corners and dugout edges regularly
  • Make sure printed graphics are squared before final tightening

Recommended product pages:


Football, Soccer, and Stadium Installations

Stadium-perimeter and sideline screens often carry sponsor graphics, team branding, or event signage. Because of that, graphic alignment and panel squaring are especially important.

Before final tightening:

  • Confirm that logos are level
  • Check that sponsor graphics are not distorted
  • Make sure the panel is square with the fence
  • Walk the full length of the screen before trimming tie tails

Take extra time during the top-rail step to verify alignment before securing the sides and bottom.


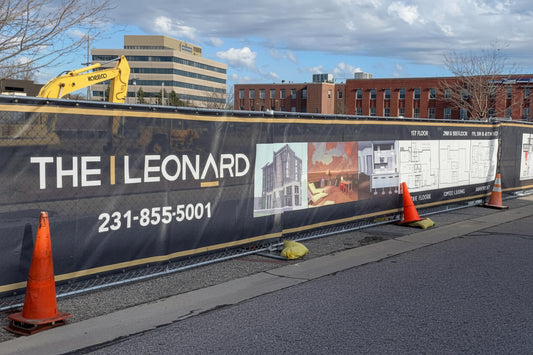
Construction and Job Site Fence Screen

Job site screens face harsh conditions, including moving equipment, debris, changing crews, and repeated fence handling.

For construction fence screen installations:

  • Use heavy-duty UV-rated ties
  • Avoid drum-tight tension
  • Inspect ties weekly
  • Replace broken fasteners quickly
  • Allow slight movement in the panel
  • Avoid over-tightening corners on temporary panels

High-Wind Installation Best Practices

For seasonal athletic windscreen and event fence screen products, proper removal and storage can significantly extend the usable life of the panel.

To remove and store windscreen properly:

  • Remove ties carefully without damaging the hems.

  • Clean off dirt and debris with a soft brush.

  • Rinse with water and mild biodegradable dish soap if needed.

  • Allow the material to dry completely.

  • Roll the screen loosely.

  • Avoid tight folding, which can permanently crease the material.

  • Store indoors in a dry, climate-controlled environment.

Never store damp screens. Moisture can cause mildew, odor, staining, and material breakdown.

A properly stored screen can last much longer than one left up year-round in harsh weather or stored while wet.

  • Over-Tightening the Screen

    Over-tightening causes grommet tear-out, excess wind stress on the fence, and premature material failure. The screen should flex slightly in wind. That movement is a feature, not a flaw.

  • Fastener Spacing Too Wide

    Fasteners that are spaced too far apart can cause sagging, flapping, uneven stress distribution, and accelerated wear at the remaining attachment points.

  • Installing on Weak Fence Structures

    Installing windscreen on a weak fence can lead to fence failure, bent rails, and pulled posts. This damage is rarely covered by warranty because the underlying fence structure was not suitable for the added wind load.

  • Ignoring Wind Load

    Large printed fence screens can create significant wind resistance. A 100-foot printed banner or screen should not be treated like ordinary fence material. It can act like a sail in strong wind.

  • Installing on the Wrong Side of the Fence

    Screens should attach to the chain link side of the fence, not the post side. Installing on the post side can cause the material to rub against poles and wear prematurely.

Frequently Asked Questions

Should the fence screen go on the inside or outside of the fence?

The screen should attach to the side of the fence where the chain link mesh is installed, which is typically the outside. Installing on the post side can cause the material to rub against the poles and wear prematurely.

How do you attach a windscreen to a chain link fence?

UV-rated heavy-duty zip ties are the recommended method for most installations. Hog rings and UV-treated nylon twine can also work, but the fastener must be rated for outdoor UV exposure.

What spacing should I use for fence screen attachment?

For standard vinyl mesh windscreens, use fasteners every 12 to 18 inches. For fabric mesh fence screens, use fasteners every 18 to 24 inches. In high-wind areas, use 12-inch spacing or tighter. Always secure every grommet, corner, and reinforced hem.

How tight should the windscreen be installed?

The screen should be taut, but not drum-tight. It should flex slightly in wind. Over-tightening is one of the leading causes of grommet tear-out and premature failure.

Is professional installation recommended?

For small permanent installs, such as one tennis court or one job site, a two-person crew with the right hardware can install windscreen successfully using this guide. For large facility installs, stadium-perimeter projects, or high-wind environments, professional installation is recommended.

How do I install a windscreen on a temporary construction fence?

Use lighter tension and heavy-duty UV-rated zip ties. Temporary panels shift with wind and job site activity, so the screen should have slight movement. A drum-tight install can bend panel frames and tear out grommets. Inspect ties weekly.

Can I install a fence screen by myself?

Most residential and small commercial installs can be done by one person, but two people make the process faster and cleaner. One person can hold and align the panel while the other attaches the ties.

How do I store windscreen for the off-season?

Remove the screen carefully, clean off debris, allow it to dry completely, roll it loosely, and store it indoors in a dry environment. Do not fold tightly or store the screen while damp.

How long should a properly installed windscreen last?

With UV-rated hardware, correct tension, and seasonal inspection, athletic and commercial windscreens typically last 5 to 7 years. Improper installation can reduce that lifespan significantly.

What should I do if my windscreen gets damaged?

For small tears, BigSigns can provide repair patches matched to your screen material and color. For large damage or widespread grommet failure, replacing the panel is usually more cost-effective than repairing it.

Download the Printable Installation Checklist

Get the full BigSigns fence screen installation checklist as a single-page PDF designed for printing and bringing to the job site.

Need Help With Your Installation?

BigSigns specialists can help with hardware recommendations, panel sizing, mesh selection for your wind environment, and qualified installer referrals.